Hyper-V is a native hardware-assisted virtualization platform provided in Windows 8 Pro and Windows Server 2008 R2 and above. In essence, a Virtual Machine is a PC emulation running on your PC. You install VM software on your physical host machine, then boot up and install any number of guest OSs. Popular VM software includes VMware, VirtualBox and Microsoft Virtual PC (which was used to power XP Mode in Windows 7).
VMs are essential for web developers:
- They allow you to test alternative browsers such as historical versions of IE or Linux installations.
- You can set up development servers such as Linux with Apache, PHP and MySQL on a Windows development PC.
VMs are hard disk images so they can be backed-up, cloned and moved far easier than a real PC. In addition, most VM software allows you to make snapshots so you can test software or configurations and revert back in the event of catastrophic failure.
Hyper-V has a number of benefits including speed, multi-core processor support and booting to VMs (users can use a guest VM as their daily OS so they can't trash the host). But the main advantage is that VMs operate in the background. There's no need to start the software; it's always running and controlling your booted guest OSs. Similarly, there's no need to open or connect to the guest OS desktop — if you're running a development server, you can simply transfer files like you would to any other device on your network.
1. Enable Hyper-V
From the Windows Control Panel, select Programs and Features followed by Turn Windows features on or off. Check Hyper-V and all platform and tools sub-components. It'll take a few minutes to install.
2. Configure Hyper-V Defaults
From the Start screen (or Win+Q), run the Hyper-V Manager. You can change the default settings in Action > Hyper-V Settings.

3. Create a New Virtual Machine
To create a new VM, select Action > New > Virtual Machine…. Enter a name for your VM and select a different file location if necessary:

Now enter the amount of memory you want the VM to use — keep it as dynamic unless you want to specify a maximum:

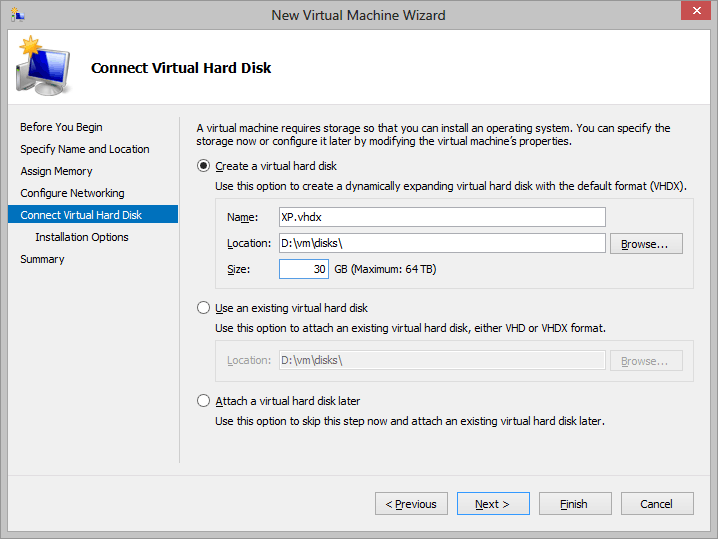
You can now create or use an existing hard disk image and specify a maximum size (it will grow as the VM requires more space):

Finally, you can choose to install an operating system from a physical drive or ISO image:

Hit Finish to complete the wizard. You can now boot your VM (click Start in the Actions pane) and install a guest OS. Remember this occurs in the background; to view the desktop, click Connect… in the Actions pane.

Note that the VM will not be able to connect to a network yet — you may wish to configure that first so updates can be downloaded.
4. Connecting to Your Network
Connecting to the network is slightly unusual compared to other VM software. Hyper-V creates a virtual switch device which is subsequently used for all host and guest connectivity. Under the right-hand Actions pane, click Virtual Switch Manager…. Select External and hit Create Virtual Switch.
Assign a name (Virtual Switch is as good as any), select the real network adapter used for networking on your host OS, and hit Apply. The dialog can then be closed.
Now, right-click your VM and choose Settings… (or click Settings… under your VM in the Action pane). Select the Network Adapter tab and ensure Virtual Switch (or whatever you named it) is selected.

Reboot your VM and, with luck, you should have network connectivity.
Network Troubles?
Many people experience networking problems with Hyper-V guests — I did. A separate hardware NIC adapter is recommended, but this is impractical for most desktop and laptop PCs. If you can't connect or connectivity randomly drops, try the following remedies:
- Configure the guest OS to use a fixed IP address.
- If it continues to fail, disable TCP Checksum Offload and UDP Checksum Offload in your physical NIC adapter settings (they may have slightly different names).
5. Connect to Your VM
As mentioned, you can click Connect… in the VM's Action pane to view the desktop. Alternatively, you can use Microsoft's Remote Desktop Connection tool much like you would with any networked Windows device.
Hyper-V offers some great features which will benefit web developers. Do you have any interesting uses for the platform?

No comments:
Post a Comment